Open chords are the foundation of acoustic guitar. With the ten shapes on this page you can play the vast majority of folk, pop and singalong songs — and every one of them is within reach in your first few weeks.
How to read a chord diagram
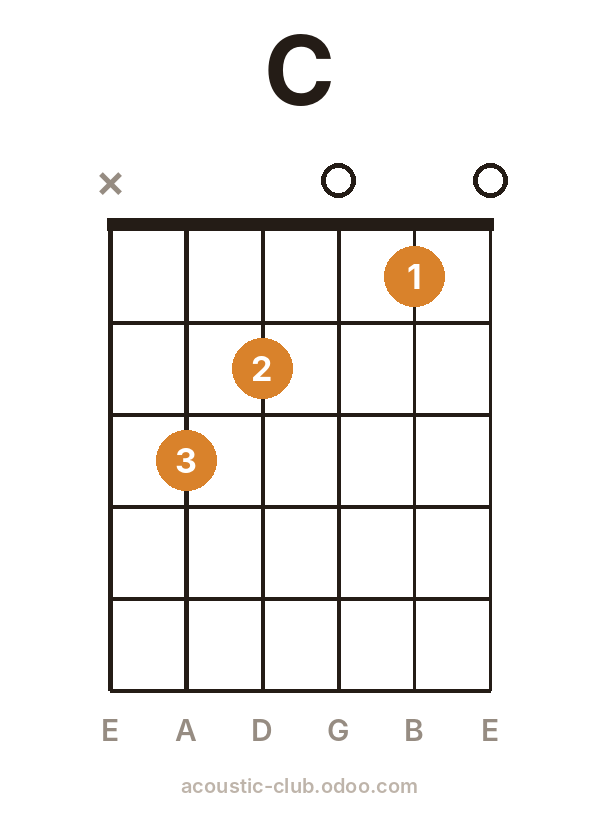
- The vertical lines are the strings. Thickest (low E) on the left, thinnest (high E) on the right.
- The horizontal lines are the frets. The thick bar at the top is the nut.
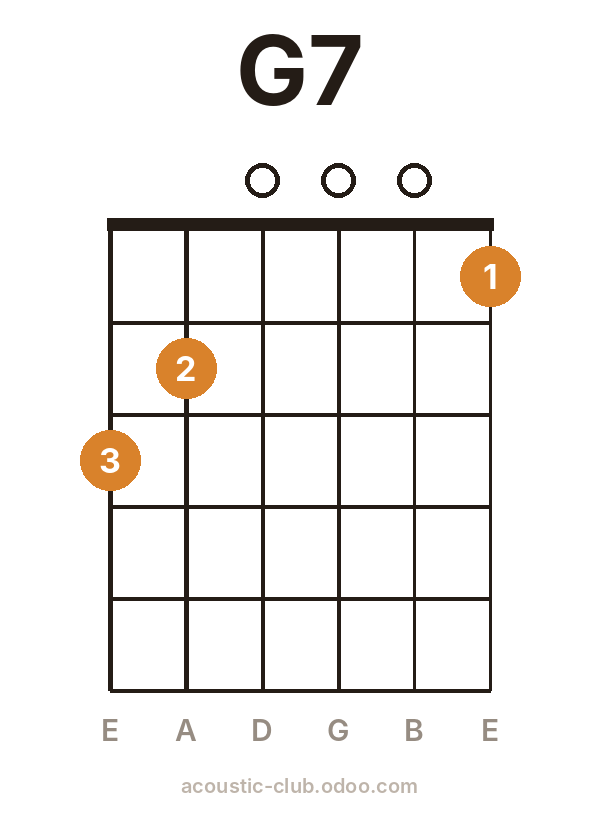
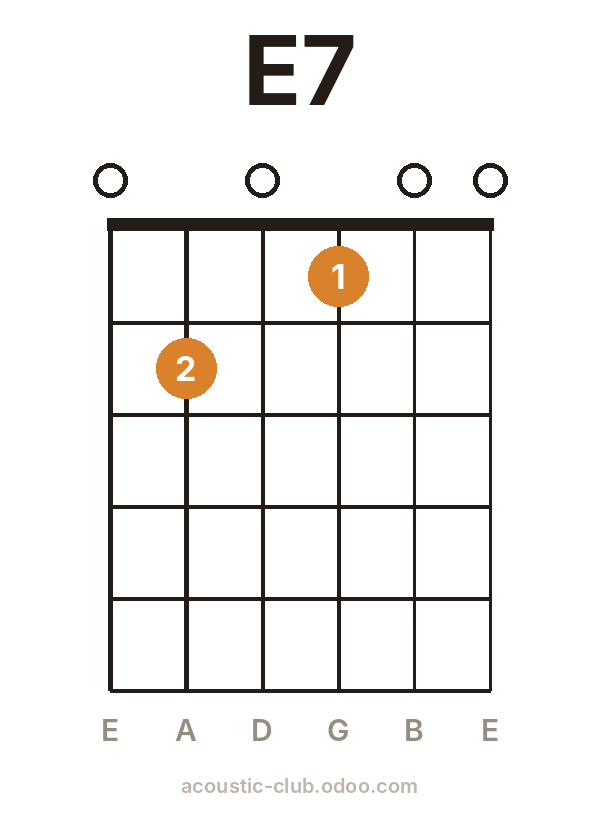
- An orange dot shows where to press. The number is the finger: 1 index, 2 middle, 3 ring, 4 little.
- O above a string means play it open. × means do not play it.
Press just behind the fret
Place your fingertip close to the fret wire, not in the middle of the gap. You will need far less pressure and get a cleaner sound.
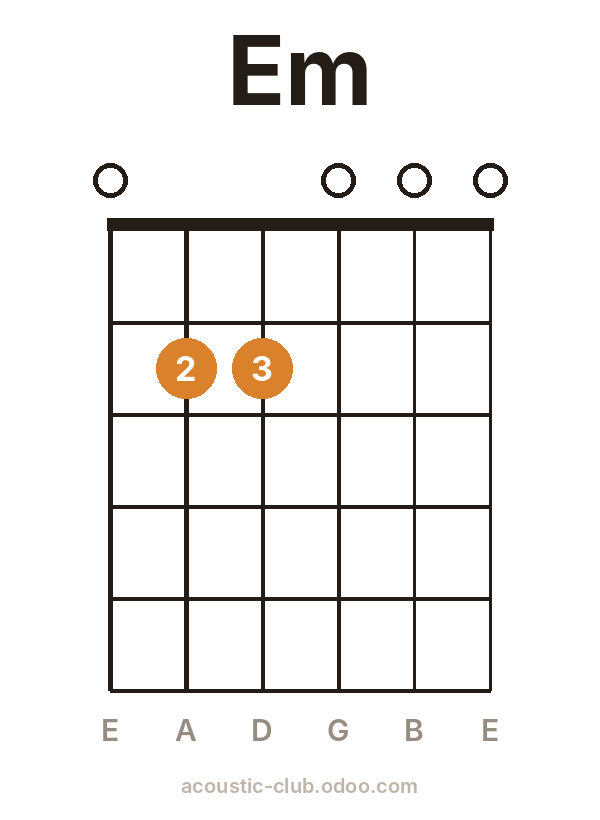
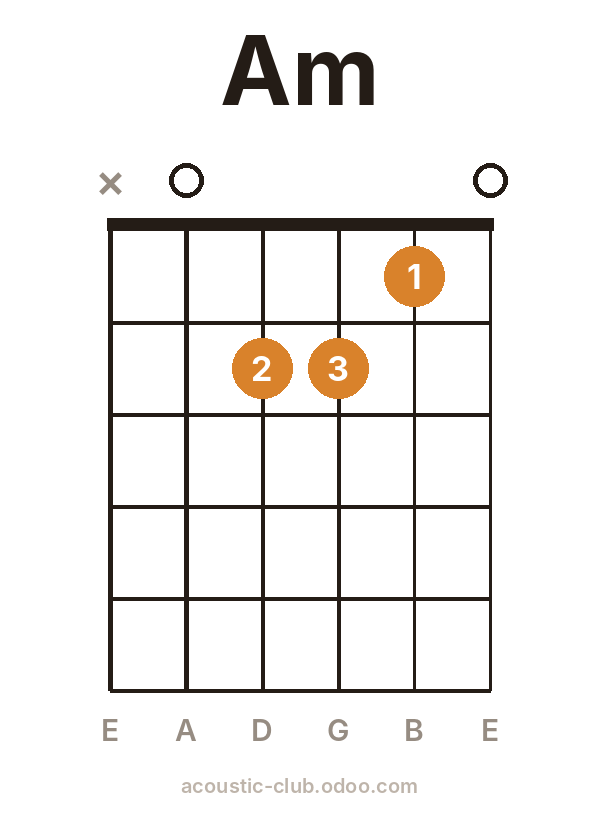
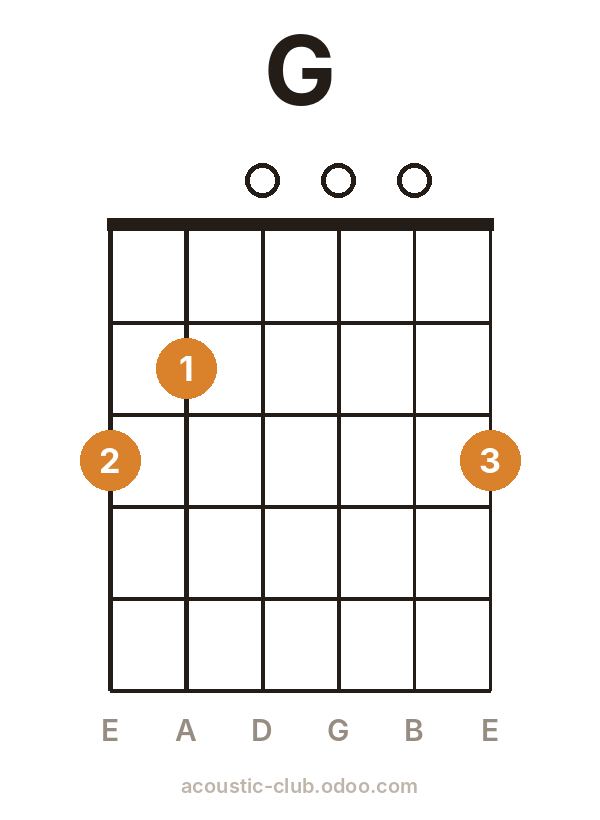
The first four: Em, Am, C and G
Start here. E minor needs only two fingers, A minor and C share a similar shape, and G will appear in almost every song you learn.
The next four: D, E, A and Dm
D is the third member of the famous G–C–D family. E and A are big, open-sounding chords, and D minor gives songs a gentle, wistful colour.
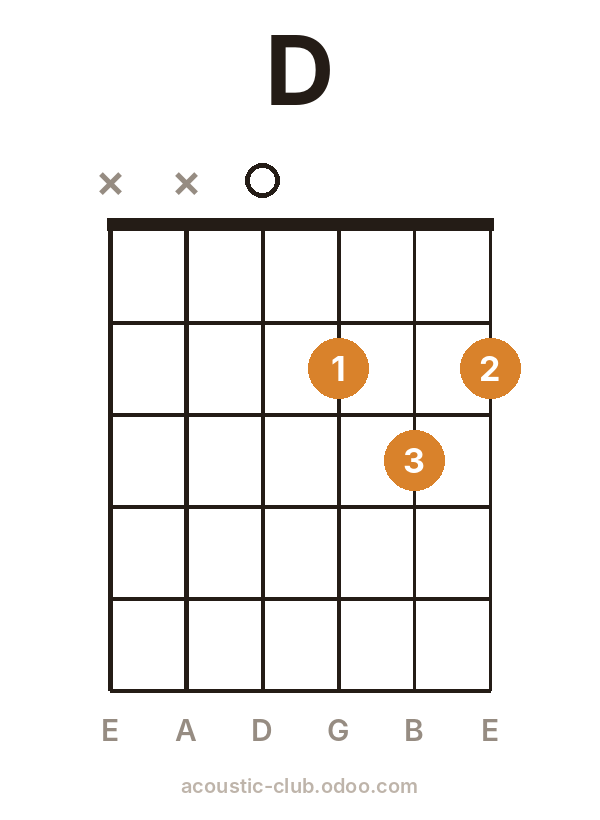
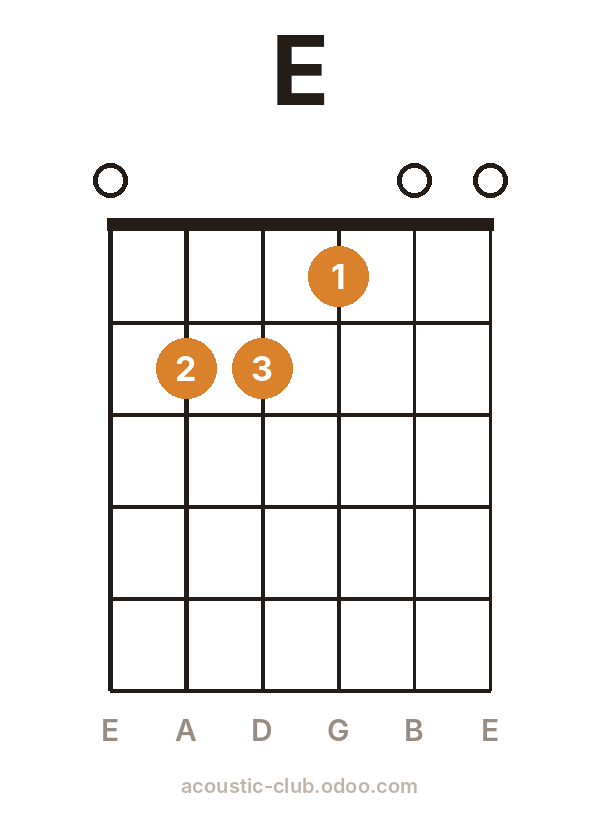
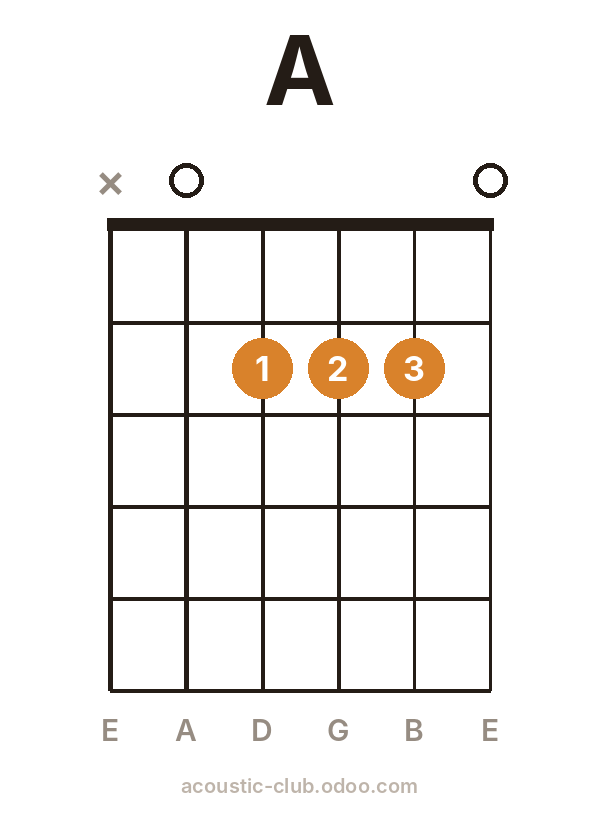
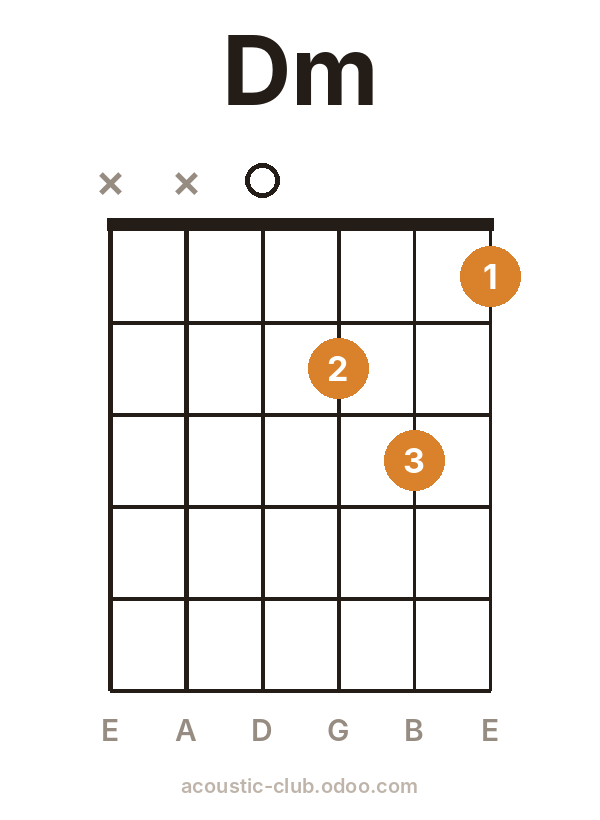
Changing chords smoothly matters far more than knowing lots of them.
Acoustic Club SessionsTwo seventh chords: G7 and E7
Seventh chords add a little tension that pulls you towards the next chord. G7 leads beautifully into C, and E7 into A or Am — you will hear this move in countless folk and blues songs.
How to practise chord changes
01
Shape it slowly
Place each finger one at a time, then strum each string individually to check every note rings clearly.
02
Lift and replace
Take your hand off completely and put the shape back down. Repeat ten times. You are teaching your fingers where to land.
03
One-minute changes
Pick two chords, set a timer for one minute and count how many clean changes you make. Write it down and beat it tomorrow.
04
Find anchor fingers
Look for fingers that stay put or slide between shapes — like the ring finger between Am and C — and keep them in contact with the string.